The 30-second answer
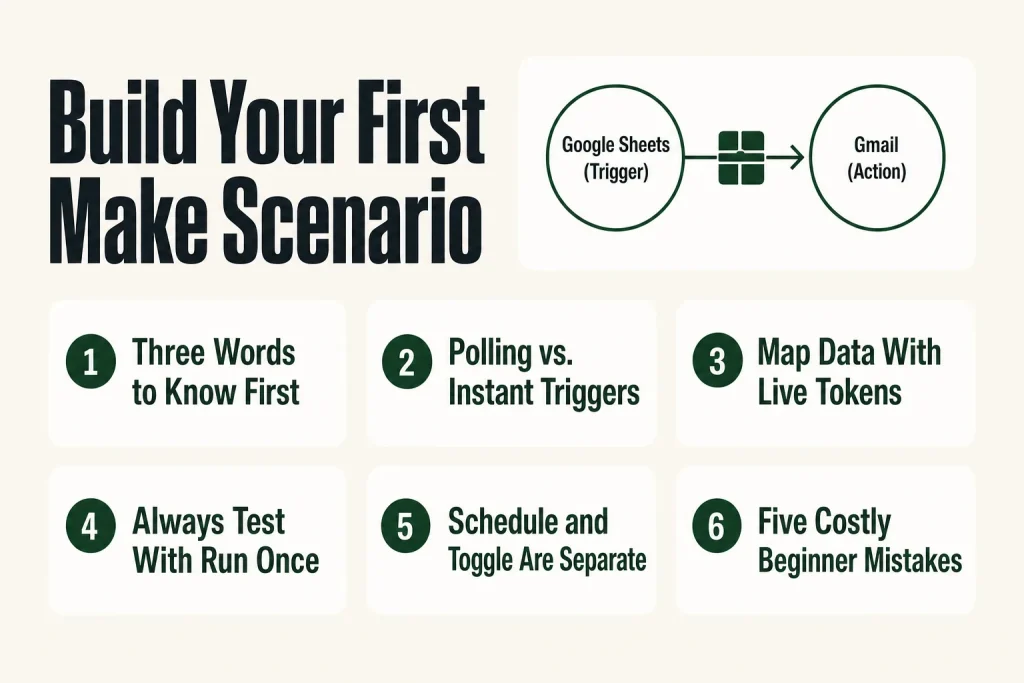
- Click + Create a new scenario in the top-right of the dashboard to open the scenario builder (the canvas).
- Click the large + in the center of the canvas to add your first module. That module will be your trigger.
- Search for your trigger app, choose the right event (e.g., Watch New Rows for Google Sheets), and authenticate the connection via OAuth.
- Click the small + that appears on the right edge of your trigger module to add an action module. Authenticate that app too.
- Open the action module, click into each field you want to populate, and pick values from the mapping panel that appears. Those colored pill tokens carry live data from your trigger.
- Click Run once to test with real data. Watch for numbered bubbles above each module.
- Set your schedule using the scheduling control in the toolbar, then flip the Active/Inactive toggle to Active. Both controls live in the top-right of the toolbar. Setting a schedule does not activate the scenario: you must flip the toggle separately.
Take this fix into your next scenario. The free Builder’s Companion Kit collects the checklists and templates that pair with this guide — so next time, you start from a template, not a blank page. Grab it free →
- The Mental Model: Triggers, Modules, and Bundles
- Step 1: Create the Scenario and Name It
- Step 2: Add Your Trigger Module
- Step 3: Add an Action Module
- Step 4: Map Data Between Modules
- Worked Example: Sheet Row to Email Notification
- Step 5: Test With Run Once Before You Activate Anything
- Step 6: Set the Schedule and Flip the Scenario On
- Five Mistakes Beginners Make on Their First Scenario
- What Comes After Your First Scenario
- FAQ
Your first Make scenario should take less than thirty minutes. The canvas looks busy the first time, but the underlying pattern is dead simple: one trigger produces data, one or more action modules consume it, and Make moves the data between them automatically. This walkthrough goes step by step, from a brand-new account and a blank canvas, all the way to a confirmed successful run, with every term explained the first time it appears.
The Mental Model: Triggers, Modules, and Bundles
Before you touch anything, get these three words straight. Everything else in Make is a variation on them.
- Module: a single step on the canvas. Every circle you see is a module. The trigger module starts everything; action modules do work in response.
- Trigger: the event that kicks the scenario off. Make supports two kinds. A polling trigger checks a service for new data on a schedule. How often it checks depends on your plan: the free plan checks no more than once every 15 minutes, while paid plans (Core and above) can check as often as every 1 minute. An instant trigger is a webhook: the external service pushes data to Make the moment something happens, so the scenario fires within seconds regardless of your plan.
- Bundle: the packet of data a module outputs. Think of it as one row in a spreadsheet, one email, or one form submission. Bundles pass left to right through your scenario, module by module.
When a scenario runs, the first module fires and either returns bundles or returns nothing. If it returns nothing, the scenario stops there. If it returns bundles, each bundle passes to the next module, and so on until every module has processed it. If everything finishes without an error, Make marks the run as successful.
That is the whole engine. Every Make scenario you will ever build is just that loop, repeated.
Step 1: Create the Scenario and Name It
Log in to Make. From the dashboard, click + Create a new scenario in the top-right corner. The scenario builder opens to a blank canvas with a large + button in the center.
Before adding anything, name the scenario. In the top-left corner of the builder, click the New scenario text and type a real name. Something like Sheet Row to Email Notification beats Untitled when you have twenty scenarios and need to find this one at 11 pm. The name saves automatically when you click away, but hit the Save button in the toolbar to lock in the full scenario state before you close the tab or walk away.
A note on saving: Make autosaves while you work, but always hit Save explicitly before you close a tab or walk away. The autosave is a net, not a plan.
Step 2: Add Your Trigger Module
Click the large + in the center of the canvas. A search bar and app tiles appear. This is the app picker.
For this walkthrough, use Google Sheets as the trigger app. Search for it, select it, and Make will show you the available modules. Choose Watch New Rows. This is a polling trigger: Make checks your sheet on a schedule and picks up any rows added since the last run. It does not catch new rows the instant they appear. On the free plan, the earliest it can check is every 15 minutes. On paid plans (Core and above), you can push that down to every 1 minute. If your use case needs truly instant detection, you need a webhook-based trigger instead.
Make will immediately ask you to Create a connection. A connection is Make’s authenticated link to your account at that service. Click it, and an OAuth popup opens. Grant the permissions Make requests, then give the connection a memorable name (something like My Google Sheets Account). You will reuse this same connection every time you add another Google Sheets module to any scenario, so naming it clearly pays off.
Once the connection is saved, the rest of the trigger config fields appear. Set:
- Spreadsheet: pick the sheet you want to watch from the dropdown. Make pulls a live list from your Drive.
- Sheet: select the tab (usually Sheet1).
- Limit: set this to 1 for your first test. The limit controls how many rows Make processes per run. Starting at 1 means you get one clean bundle to inspect, not fifty rows firing at once.
Click OK to save the trigger config. Your canvas now has one module on it.
One thing beginners miss: the trigger module only fetches rows it has not seen before in this scenario. The first time it runs, Make asks you where to start: from a specific row, from the beginning, or from now on. For testing, choose All so you can see real data immediately. For a live scenario, choose From now on so you do not flood your action with historical rows.
Step 3: Add an Action Module
Click the small + icon that appears on the right edge of your trigger module. The app picker opens again. This time, search for Gmail and choose Send an Email as the action.
You need to create a connection for Gmail too. Same process: click Create a connection, authorize via OAuth, name it, save it. If you used the same Google account for both modules, Make still treats them as separate connections because they are separate app integrations with their own permission scopes.
Your canvas now shows two circles linked by an arrow: Google Sheets on the left, Gmail on the right. That arrow is the bundle path. Data flows left to right.
Now configure the Gmail module. You need to fill in at least these fields:
- To: the recipient email address.
- Subject: a subject line.
- Content: the email body.
You can type static text into any field. But the point of automation is to use real data from your sheet, and that is where mapping comes in.
Step 4: Map Data Between Modules
Mapping is how data moves from one module to another inside your scenario. When you click into a text field inside a module config, a mapping panel slides out. It shows all the data variables available from previous modules: column names from your sheet, metadata like row numbers, timestamps, and so on.
Click on a variable and it drops into the field as a colored token. That token tells Make: every time this scenario runs, grab the live value of this field and put it here. A token is not a static copy of a value. It is a live reference.
For the Gmail module, try this setup:
- To: type your own email address (static text, fine for a test).
- Subject: type New row: then click the token for column A from your sheet. The subject will now read New row: [whatever is in column A] at run time.
- Content: map a few more columns from your sheet so the email body has real content to show you the mapping worked.
If you do not see any tokens in the mapping panel, it means Make has not yet fetched sample data from your trigger. Close the Gmail module, right-click your Google Sheets module, and choose Run this module only. Make will fetch a row and store its structure as sample data. Then reopen Gmail and the tokens will be there.
If you need to do more with the data before it reaches your action, Make has a full library of string and date functions you can apply directly inside the mapping field. The Make string functions reference and the Make date functions guide both show the syntax with real examples.
Worked Example: Sheet Row to Email Notification
Here is the complete two-module scenario so you can see all the pieces together.
Setup checklist:
- Create a Google Sheet with headers in row 1: Name, Company, Email, Status. Add one test row below the headers.
- Open Make. Create a new scenario named New Row Notification.
- Add Google Sheets > Watch New Rows as the trigger. Connect your Google account. Select the sheet. Set Limit to 1.
- Add Gmail > Send an Email as the action. Connect your Google account.
- In the Gmail module, set To to your email. Set Subject to:
New entry: {{1.Name}}(where{{1.Name}}is the Name token from module 1). Set Content to map Name, Company, Email, and Status tokens on separate lines. - Click OK to close the Gmail module. Save the scenario.
What the data flow looks like:
- Google Sheets produces one bundle containing the row values: Name, Company, Email, Status.
- Gmail receives that bundle, inserts the token values into the fields you mapped, and sends the email.
- Make marks the run successful and updates the trigger’s internal bookmark so the next run only picks up newer rows.
Timing note: because Watch New Rows is a polling trigger, Make does not detect the new row the instant you add it to the sheet. It detects it on the next scheduled check: at most every 15 minutes on the free plan, or as short as every 1 minute on a paid plan (Core and above). If your workflow needs to react within seconds of a new row appearing, you need an app that supports a webhook-based (instant) trigger instead of a polling one.
Two modules. One bundle. One email. This is the core pattern. Every scenario you build after this, no matter how complex, is just this pattern with more modules and more logic added in between.
Step 5: Test With Run Once Before You Activate Anything
Never activate a scenario you have not tested. Click Run once in the toolbar. Make executes the scenario a single time against real data, without putting the scenario into a live schedule.
After the run, numbered bubbles appear above each module. The number tells you how many bundles that module processed. Click a bubble to open the execution detail for that module. You will see two panels: Input bundle (what the module received) and Output bundle (what it produced and passed forward). This is where you verify that your mapping actually worked: the name in the email subject should match the name in the row.
If you see an error instead of a number, the bubble turns red and shows an error message. Read the message before you change anything. Most first-run errors are one of three things: a misconfigured connection, a required field left blank, or a data type mismatch (a number field getting a text token). Fix the specific thing the error message points to, then run again.
One thing to know about credits: Make switched from “operations” to “credits” as its billing unit in August 2025, but for standard (non-AI) modules the math is the same. Each standard module that executes consumes one credit per bundle it processes. Routers and filters are free and cost no credits. Some modules bill differently: the Make Code app costs 2 credits per second of execution time, and native Make AI modules use variable token-based rates. For this two-module scenario, the math is simple: the trigger costs one credit when it runs (even if it finds nothing), and the Gmail action costs one credit per bundle it processes. So a two-module scenario processing one bundle costs two credits per run. The free plan includes 1,000 credits per month, which covers most learning and light personal automation needs. Keep this math in mind as your scenarios grow.
Step 6: Set the Schedule and Flip the Scenario On
After a clean test run, your scenario is ready to go live. Two things need to happen, and they are separate actions: set the schedule, then activate the scenario. Doing one does not do the other.
Set the schedule first. Both the scheduling control and the Active/Inactive toggle live in the top-right of the toolbar, separate from the editing and testing controls. This is confirmed in Make’s own toolbar documentation. Click the scheduling control (it shows the current interval, defaulting to Every 15 minutes) to open the scheduling overlay. For a polling trigger like Watch New Rows, you choose how often Make checks for new data. On the free plan, the minimum interval is 15 minutes. On paid plans (Core and above), you can go down to every 1 minute. You can also set hourly, daily, or custom intervals. Pick the interval that fits your use case. A scenario that processes overnight form submissions does not need to run every 15 minutes. And remember: a shorter interval means more trigger credits consumed, even on runs where no new rows exist.
Then activate separately. A newly created scenario is inactive by default. Find the Active/Inactive toggle in the top-right of the toolbar (it turns green when active). Flip it to Active. Make will now run the scenario automatically on the schedule you just set. Back on the Scenarios dashboard, the scenario shows as Active.
Important: setting a schedule does not activate a scenario, and saving does not activate it either. You have to flip the toggle explicitly as a separate step. This trips up almost every beginner at least once. If a scenario you thought was running turns out to have never run, check the toggle first, then verify the schedule was saved.
For a full breakdown of how polling intervals, instant triggers, and scheduling logic interact, Make Scheduling Explained covers it in detail.
Five Mistakes Beginners Make on Their First Scenario
These are not theoretical. They are the actual things that eat time on a first build.
- Activating without testing. Run Once costs the same credits as a live run, but lets you catch mapping errors before they fire against real customers or data. Always run first.
- Setting the trigger limit too high. When you first connect a polling trigger, Make does not know what it has already processed. If you have 2,000 rows and the limit is 100, the first run processes 100 of them through every action module. Set Limit to 1 for testing. Raise it only once you understand the data volume.
- Skipping the connection name. Make auto-generates names like My Google Account (1). When you have three Google accounts connected across multiple scenarios, you will not know which is which. Name connections clearly when you create them.
- Forgetting the toggle, or confusing it with the schedule. Setting a schedule does not activate the scenario. Saving does not activate it either. The Active/Inactive toggle is a separate step, and both it and the scheduling control live in the top-right of the toolbar. Check both every time you set up or edit a scenario.
- Using a live production account for first tests. If your action is Send an Email or Create a Contact in CRM, test against a sandbox account or a throwaway email. It is easier to delete test data than to apologize for 47 accidental emails to real contacts.
If mapping tokens go missing after you edit a module, that is a different issue with its own causes. The Make Mapping Fields Missing guide covers every reason that happens and how to restore them.
What Comes After Your First Scenario
A two-module scenario is complete and useful. It is also the foundation for everything more complex. Here is where the natural learning path goes from here.
- Filters. Add a filter between modules to stop a bundle from reaching the action unless certain conditions are true. Only send the email if the Status column says Qualified. Filters cost no credits: they are genuinely free and do not consume your monthly allowance. If your filter is passing everything or blocking everything when it should not, see Make Filter Not Working.
- More action modules. Click the + on the right edge of your Gmail module to add a third module. Chain as many actions as you need. Each standard action module adds one credit per bundle processed.
- Routers. When you need a bundle to go down more than one path (send an email AND create a row in a different sheet), add a Router. Routers themselves cost no credits, though the action modules on each branch do. The Make Router guide explains how routes, filters, and the fallback route work together.
- Webhooks. When you want your scenario to fire within seconds rather than wait for the next polling interval, switch your trigger to a webhook (instant trigger). Unlike polling triggers, instant triggers are not bound by the 15-minute free-plan floor: they fire as soon as the external service sends data, on any plan. Make Webhooks Explained covers setup, credit behavior, and the traps nobody mentions.
- Error handling. Once a scenario is live, things will occasionally fail: a connection expires, a third-party API returns a 429, a required field comes in empty. Build in error handling before those failures become silent data loss.
The pattern you learned today (trigger produces a bundle, mapping carries the data, action consumes it) stays true no matter how deep you go. The complexity comes from more modules and more conditional logic, not from a different underlying model.
FAQ
How do I create my first scenario in Make?
Log in to Make, click ‘+ Create a new scenario’ in the top-right of the dashboard, and the scenario builder opens. Click the large + on the canvas to add your first module (your trigger), then click + on the right edge of that module to add an action. Configure both, map the data fields you need, and click Run once to test before activating.
What is the difference between a trigger and an action in Make?
The trigger is always the first module. It watches for an event (a new row, a new email, a form submission) and produces a bundle of data when that event happens. Action modules receive that bundle and do something with it: send an email, create a record, post a message. Every scenario has exactly one trigger and can have as many action modules as you need.
What does Run Once do in Make, and does it cost credits?
Run once executes your scenario a single time using real data, without activating the scenario on a live schedule. It is how you test before going live. Yes, it does consume credits: each standard module that runs uses one credit per bundle processed, the same as a live run. Routers and filters are free and cost no credits. Use Run once deliberately, especially when your trigger could pull many rows.
Why is my Make scenario not running after I save it?
Saving does not activate a scenario, and setting a schedule does not activate it either. These are two separate actions. A newly created scenario is inactive by default. You need to flip the Active/Inactive toggle (in the top-right of the toolbar) to Active explicitly, after also confirming your schedule is set. Check both if a scenario you expected to run has not.
How many scenarios can I have on Make’s free plan?
The free plan lets you build unlimited scenarios, but only 2 can be active (running on a schedule) at the same time. You also get 1,000 credits per month, and the minimum scheduling interval is 15 minutes. Verify current limits at make.com before making plan decisions, as these numbers can change.
What is data mapping in Make and why does it matter?
Mapping is how you tell Make which piece of data from one module should populate a field in the next module. When you click into a field inside a module config, a mapping panel appears showing all available variables (tokens) from upstream modules. You click a token to drop it into the field. Without mapping, every field would need to be filled with static text, which defeats the purpose of automation.
Will Make pick up new Google Sheets rows immediately?
No, not with a polling trigger like Watch New Rows. Make checks your sheet on a schedule, so new rows are picked up on the next scheduled run, not the moment they appear. On the free plan the fastest that check runs is every 15 minutes. On paid plans (Core and above) you can set it as low as every 1 minute. If you need truly instant detection, you need an app that supports a webhook-based (instant) trigger instead.
Sources:
Sources: Make Help Center: Add your first app; Make Help Center: Test your scenario; Make Help Center: Types of modules; Make Help Center: Active and inactive scenarios; Make Help Center: Scenario execution flow; Make Help Center: Improved scenario toolbar and version control; Make Help Center: Schedule a scenario; pricing and credit limits verified against make.com pricing page, Make community announcements, and multiple cross-referenced sources (November 2026).
Brian Kasday spent forty years in direct-response marketing before rebuilding the whole operation as a one-person shop. He writes The Operator’s Library — including “The Missing Manual for Make” — for operators who’d rather build it themselves than wait on someone else.
Get the Builder’s Companion Kit — the free checklists and templates that pair with this guide: mmsvegas.com/make-resources. New to all of this? Start Here lays out the whole library in reading order.
This guide solves one Make problem. The Missing Manual for Make covers the production system. See the manual →
More Make guides
Free · Make Operator Toolkit
Running scenarios in Make?
Get the free operator toolkit — production checklists and the fixes that keep scenarios alive under real traffic, plus a note when this guide changes.
Get the free toolkit →