
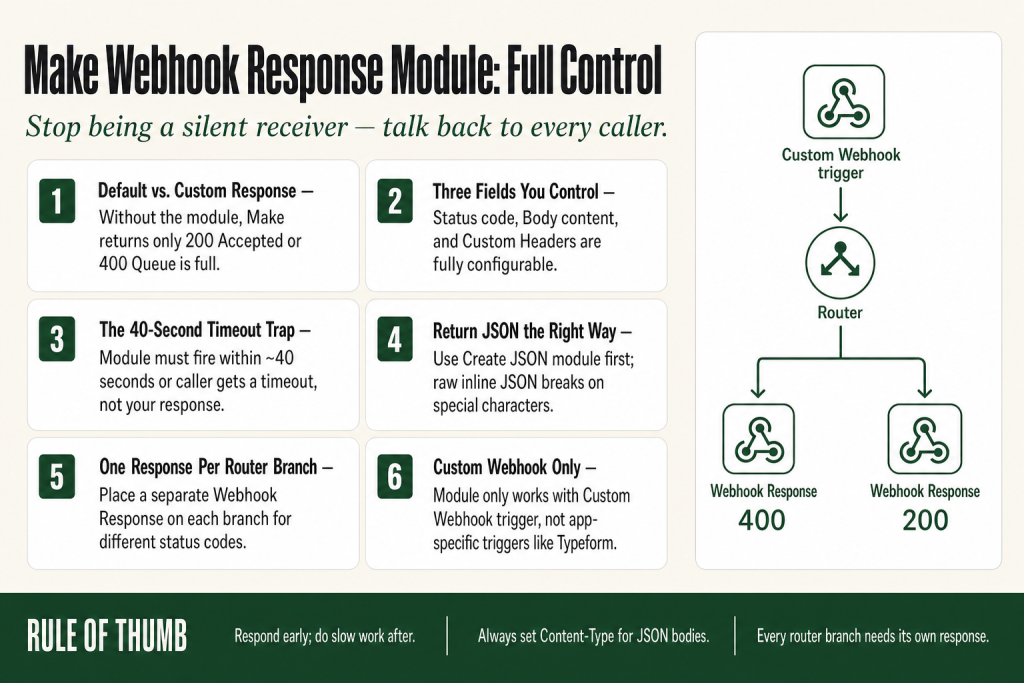
The 30-second answer
- Add the Webhooks > Webhook Response module anywhere in your scenario after the Custom Webhook trigger.
- Set Status to a 2xx code (200 or 201 are most common) for success; use 4xx to signal a bad request back to the caller.
- Put anything in Body: plain text, JSON, HTML. If you return JSON, add a
Content-Type: application/jsoncustom header so the caller parses it correctly. - Without the Webhook Response module, Make returns
200 Acceptedwhen the webhook queues and400 Queue is fullwhen the queue is saturated. - The Webhook Response module must fire within roughly 40 seconds of the incoming request or the caller gets a timeout, not your custom response.
- You can place one Webhook Response module on each router branch so different paths return different status codes and bodies.
- Your judgment stays in the loop. The module only returns what you map into it.
Take this fix into your next scenario. The free Builder’s Companion Kit collects the checklists and templates that pair with this guide — so next time, you start from a template, not a blank page. Grab it free →
- What the Webhook Response Module Does (and What Happens Without It)
- The Three Fields in the Make Webhook Response Module
- The Timeout Trap: Why Your Custom Response Never Arrives
- Where to Place the Webhook Response Module (Including Router Paths)
- Returning JSON: The Right Way to Build the Body
- Worked Example: A Make Webhook Response That Returns Validated Data
- Redirect Responses: Sending a 3xx Back to a Browser
- Common Mistakes with the Make Webhook Response Module
- FAQ
A make webhook response is how your scenario stops being a silent receiver and starts talking back. Without it, every caller gets the same blunt reply: 200 Accepted. That works fine when the caller is a fire-and-forget service that doesn’t care what you say. But the moment your caller is another scenario, a form, an AI agent, or any system that checks your response before deciding what to do next, you need to control exactly what comes back: the status code, the body, and sometimes specific headers. This page covers every field in the Webhook Response module, the traps that bite operators who skip the docs, and the patterns that actually hold up in production.
What the Webhook Response Module Does (and What Happens Without It)
Every Custom Webhook trigger in Make accepts an incoming HTTP request and immediately queues it. The caller is sitting there waiting for an HTTP response. Make has to say something back.
When your scenario has no Webhook Response module, Make replies automatically:
200 Acceptedwhen the request enters the queue successfully.400 Queue is fullwhen the webhook queue is saturated.
Those defaults are fine for simple fire-and-forget integrations. They break as soon as the caller needs to parse a response body, check a status code, or follow a redirect. A Stripe payment confirmation, a chatbot API call, or another Make scenario waiting for a structured answer all need more than “Accepted.”
The Webhooks > Webhook Response module gives you full control: status code, body content, and custom headers. Think of it as the return statement for your scenario. You decide what goes back, and the caller gets it the moment that module executes.
For a broader look at how webhooks work in Make, including queuing, credits, and the traps nobody warns you about, see Make Webhooks Explained.
The Three Fields in the Make Webhook Response Module
The module has three configurable areas: Status, Body, and Custom Headers. Here is what each one does and where operators go wrong.
Status
This is a plain number field. Enter any valid HTTP status code. The official docs confirm the field accepts 2xx (success), 3xx (redirect), and 4xx/5xx (error) families. The value must be 100 or higher.
Common values:
200OK. General success.201Created. Use this when the scenario created a new record on the caller’s behalf.400Bad Request. Signal that the incoming payload was invalid. You can pair this with an explanatory body.401or403for auth failures.303See Other (redirect). Pair with aLocationheader pointing at the redirect URL.
You can map a dynamic value into Status if you want the code to reflect the outcome of a previous module, but most scenarios use a hardcoded number.
Body
Put anything here that the caller can consume: plain text, JSON, HTML, XML. The field accepts mapped variables from earlier modules, so you can return data that your scenario produced.
If you return JSON, build it with the Create JSON module first, then map its output into Body. Pasting raw JSON strings manually works in simple cases but breaks the moment a value contains a quote or a newline.
Custom Headers
Headers are key-value pairs. The most important one is Content-Type. The official apps documentation is clear: set the Content-Type header to the MIME type that matches your body. If you skip it and return JSON without declaring application/json, some callers will treat the body as plain text and fail to parse it.
Common header patterns:
Content-Type: application/jsonfor JSON bodies.Content-Type: text/htmlfor HTML pages.Location: https://yoursite.com/thank-youwhen Status is a 3xx redirect code.- Custom metadata headers like
X-Request-IDif your caller tracks request identifiers.
Headers are lowercased in transit by Make’s gateway, which is a known behavior. If your caller reads a custom header by its exact case, verify the header name arrives as expected before relying on it in production.
The Timeout Trap: Why Your Custom Response Never Arrives
This is the most common production failure with this module, and I’ve hit it myself building scenario-to-scenario pipelines.
The Webhook Response module has to execute within roughly 40 seconds of the initial request arriving at your webhook URL. If your scenario takes longer than that, the caller gets a timeout error, not your custom response. The Webhook Response module then fires into a void.
Forty seconds sounds like a lot. It isn’t, once you add an OpenAI call, a slow Google Sheets lookup, or any external API with a retry delay baked in. The timer starts the instant Make receives the request, not when your modules start processing.
The pattern that beats this: return the Webhook Response immediately with a 200 acknowledgment, then do the heavy work in the rest of the scenario. The caller gets a fast, clean response. Your automation still runs to completion.
Custom Webhook
  |
  +-- Webhook Response (200, body: {"status":"received"})
  |
  +-- [slow modules: AI, external APIs, data processing]
If the caller genuinely needs the result of the heavy work (not just an acknowledgment), you have a synchronous design problem that a single scenario usually can’t solve cleanly. A common pattern is to store the result in a data store and have the caller poll a second webhook endpoint. That keeps both ends fast. See Make Data Stores for how to set that up.
If your scenario is getting stuck mid-execution in ways that look like timeout-related failures, Make Scenario Stuck Processing walks through the diagnostic sequence.
Where to Place the Webhook Response Module (Including Router Paths)
You can place the Webhook Response module anywhere after the trigger. Make executes it the moment it reaches that point in the flow.
Two useful patterns:
Early acknowledgment (fire-and-forget)
Put the Webhook Response module as the second module, right after the trigger. The caller gets a response in milliseconds. The rest of the scenario runs unrelated to the caller’s connection. Use this when the caller only needs to know you received the data.
Per-branch responses on a Router
Put a separate Webhook Response module at the end of each router branch. Each branch can return a different status and body. For example: one branch validates the payload and returns 400 with an error message if a required field is missing; the happy path returns 200 with the processed result.
For a deep dive on how routers work and why a bundle can hit multiple branches, see Make Router: Routes, Filters, the Fallback Route.
One important constraint: if no Webhook Response module executes during a run (because a filter blocked all branches, for example), the caller gets Make’s built-in default response, not an error. Build your filters carefully. A filter that silently drops the bundle leaves the caller hanging with no meaningful signal.
On error handler routes
You can attach a Webhook Response module to an error handler route. If a module upstream fails, the error route fires and you can return a 500 or a structured error body instead of leaving the caller in a timeout. This pairs naturally with the Make Error Handling patterns covered elsewhere in this library.
Returning JSON: The Right Way to Build the Body
This is where most operators cut corners and pay for it later.
The wrong approach: type a JSON string directly into the Body field, mapping variables inline like this:
{"order_id": "{{1.body.id}}", "status": "ok"}That works until a mapped value contains a double quote, a backslash, or a newline. Then the JSON is malformed and the caller fails to parse it.
The right approach:
- Add a JSON > Create JSON module before the Webhook Response module.
- Define your output structure there. Make handles escaping.
- Map the Create JSON output into the Body field of the Webhook Response module.
- Add a
Content-Type: application/jsoncustom header.
The Make Create JSON module guide covers nested structures and the gotchas that trip people up when the payload has arrays or dynamic keys.
If you’re building the response body from data that came in as JSON, and your Parse JSON module is producing empty output, that’s a separate problem. See Make Parse JSON Not Working before you get to the response step.
Worked Example: A Make Webhook Response That Returns Validated Data
This walkthrough builds a lightweight validation endpoint. A caller posts a JSON body with an email field. The scenario checks the field, then returns either a structured success response or a 400 error body.
Scenario layout
- Webhooks > Custom Webhook (trigger). Enable “Get request headers” in the advanced settings if you need to inspect authorization headers later.
- Flow Control > Router with two branches.
Branch 1: validation fails
- Filter:
emailfield does not exist or is empty. - JSON > Create JSON: build
{"error": "email is required"}. - Webhooks > Webhook Response: Status
400, Body = output of Create JSON, Custom Header:Content-Type: application/json.
Branch 2: validation passes
- Filter:
emailfield exists. - [your processing modules here: write to a data store, call an API, etc.]
- JSON > Create JSON: build
{"status": "ok", "email": "{{mapped email value}}"}. - Webhooks > Webhook Response: Status
200, Body = output of Create JSON, Custom Header:Content-Type: application/json.
What the caller receives
On a missing email field: HTTP 400 with body {"error": "email is required"}.
On a valid payload: HTTP 200 with body {"status": "ok", "email": "[email protected]"}.
The caller can now branch its own logic on status code. Your scenario is behaving like a real API endpoint, not a black box.
To deduplicate repeat calls (callers that retry on timeout), check the incoming payload against a data store before processing. Make Data Store Duplicate Records shows the exact pattern.
Redirect Responses: Sending a 3xx Back to a Browser
If the caller is a browser (a form submission hitting your webhook URL, for example), you can redirect it to a confirmation page using a 3xx status code and a Location header.
Configure the Webhook Response module:
- Status:
303(See Other is the correct code for a POST-then-redirect pattern;301and302also work depending on your intent). - Body: can be left blank or contain a short message for non-browser clients.
- Custom Headers: Key
Location, Value = the URL you want the browser to visit.
This is exactly how the official apps documentation illustrates the redirect use case. The browser receives the 303, follows the Location header, and lands on your thank-you page. No JavaScript required.
One caveat: this only works when the caller is a browser or a client that follows redirects. Many HTTP libraries and API clients do not follow 3xx responses automatically. Verify your caller’s redirect behavior before relying on this pattern.
Common Mistakes with the Make Webhook Response Module
These are the mistakes I see most often, in rough order of frequency.
Missing the Content-Type header on a JSON body
You return JSON in the body but forget the header. The caller receives bytes it can’t automatically parse. Always pair a JSON body with Content-Type: application/json.
Placing the response module after a slow API call
The caller times out before the module fires. Move the Webhook Response module earlier in the flow if the caller only needs an acknowledgment. See the timeout section above.
Building JSON by hand in the Body field
Inline JSON strings break on special characters. Use the Create JSON module and map its output.
Expecting the Webhook Response module to work with app-specific webhook triggers
The Webhook Response module only works with the Custom Webhook trigger (and Custom Mailhook). It does not work with app-specific instant triggers like Typeform or Shopify. Those triggers handle their own acknowledgment handshake at the platform level.
No Webhook Response module on all router branches
One branch returns your custom response; the other branches return Make’s default “Accepted.” The caller gets inconsistent status codes depending on which route the bundle took. Put a Webhook Response module on every branch that matters to the caller.
Rotating the webhook URL
This isn’t a Webhook Response issue directly, but a related trap: deleting and recreating a webhook module generates a new URL and breaks every integration pointing at the old one. Changing response behavior never requires a new webhook URL.
FAQ
What does the webhook response module do in Make?
It sends a custom HTTP response back to whatever called your webhook URL. You control the status code (like 200 or 400), the body content (plain text, JSON, HTML), and response headers. Without it, Make returns a hardcoded 200 Accepted or 400 Queue is full.
How do I return JSON from a Make webhook?
Add a JSON > Create JSON module before the Webhook Response module to build your payload safely. Map its output into the Body field. Then add a Custom Header with key Content-Type and value application/json. Avoid typing raw JSON strings directly into the Body field because special characters break the structure.
Make webhook response timeout, how long do I have?
The Webhook Response module needs to execute within roughly 40 seconds of the initial request hitting your webhook URL. If your scenario takes longer, the caller receives a timeout error instead of your custom response. The fix is to place the Webhook Response module early in the scenario and acknowledge receipt immediately, then do slow work afterward.
Can I use the webhook response module with Typeform or other app-specific triggers?
No. The Webhook Response module only works with the Webhooks > Custom Webhook trigger and the Custom Mailhook trigger. App-specific instant triggers like Typeform or Shopify handle their own acknowledgment at the platform level, separate from your scenario.
How do I send different status codes on different router branches?
Place a separate Webhook Response module at the end of each router branch. Each one can have its own Status and Body values. For example, a validation-failure branch returns 400 with an error body, while the success branch returns 200 with the processed result.
Does the webhook response module cost extra operations?
Yes, like every module in a scenario, the Webhook Response module counts as one operation per execution. It’s a single module execution, so the cost is minimal, but it does increment your operation count.
Sources:
Sources: Make Apps Documentation: Webhooks (Webhook Response module); Make Help Center: Webhooks; Make Academy: Exchanging data with webhooks; Make Developer Hub: Webhooks (respond directive, headers, status). All platform behavior verified against live documentation, September 2026.
Brian Kasday spent forty years in direct-response marketing before rebuilding the whole operation as a one-person shop. He writes The Operator’s Library — including “The Missing Manual for Make” — for operators who’d rather build it themselves than wait on someone else.
Get the Builder’s Companion Kit — the free checklists and templates that pair with this guide: mmsvegas.com/make-resources.
This guide solves one Make problem. The Missing Manual for Make covers the production system. See the manual →
More Make guides
Free · Make Operator Toolkit
Running scenarios in Make?
Get the free operator toolkit — production checklists and the fixes that keep scenarios alive under real traffic, plus a note when this guide changes.
Get the free toolkit →